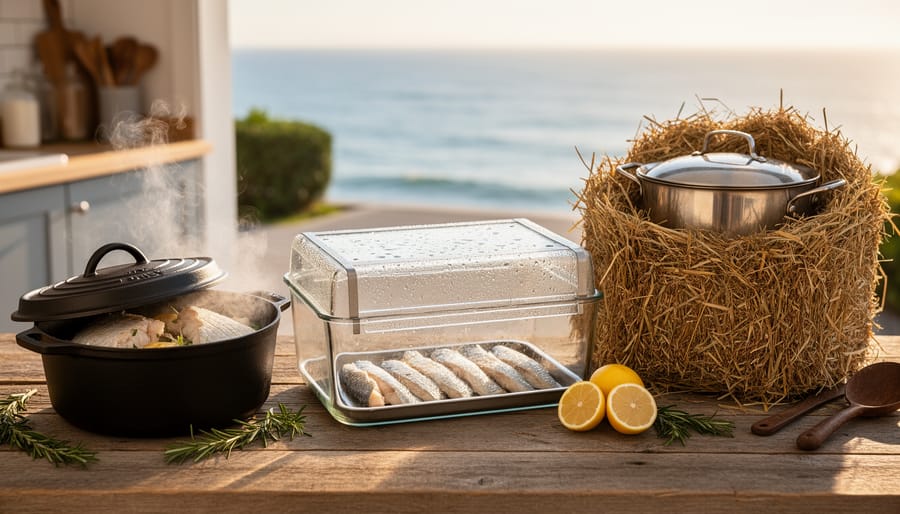
You can cook fresh seafood perfectly without a conventional kitchen oven by using three legitimate alternative methods: Dutch ovens for cast-iron heat retention, solar ovens that harness sunlight for gentle cooking, and hay-box insulation ovens that finish the cooking process off-heat. Each technique has been proven over generations, from fishing villages along the Mediterranean to sustainable cooking communities across North America, delivering results that rival traditional ovens while offering unique advantages for delicate proteins like fish and shellfish.
At Two Sea Fish Market, we’ve spent decades perfecting seafood preparation techniques that honor both tradition and innovation. These unconventional oven methods aren’t gimmicks or novelty cooking stunts. They’re serious culinary tools that professional chefs and home cooks have relied on when conventional ovens weren’t available or when the cooking method itself produced superior results. Dutch ovens create an enclosed steam environment that keeps salmon moist and cod tender. Solar ovens cook halibut and sea bass at consistent low temperatures without the hot spots that cause uneven doneness. Hay-box ovens use retained heat to finish cooking overnight, transforming tough octopus into fork-tender portions while you sleep.
The beauty of these methods extends beyond results. They align with sustainable cooking practices, reduce energy consumption, and connect you to culinary traditions that predate electric ovens by centuries. Whether you’re preparing our wild-caught Gulf shrimp, Atlantic scallops, or whole branzino, understanding these alternatives gives you flexibility and control that standard oven cooking sometimes can’t match.
What Makes an Oven ‘Unconventional’
An unconventional oven is any enclosed cooking vessel or system that uses indirect, retained, or alternative heat sources instead of standard electric or gas oven elements. These unusual cooking methods include Dutch ovens heated by stovetop burners or charcoal, solar box ovens that capture and concentrate sunlight, and hay-box cookers that rely on retained heat from insulation. What makes these legitimate ovens is their ability to create controlled, enclosed heat environments that cook food through radiant warmth rather than direct flame or electric coils.
Premium seafood from Two Sea Fish Market thrives in these gentle cooking environments. Delicate fish fillets and shellfish respond beautifully to the even, surrounding heat that unconventional ovens provide. Unlike direct heat that can quickly dry out or toughen seafood, these methods create moisture-retaining environments that preserve the natural texture and flavor of quality fish. A Dutch oven traps steam around a whole fish, while a solar oven’s gradual temperature rise prevents the protein shock that causes rubbery texture.
These techniques connect directly to historic coastal cooking traditions. Fishermen have used cast iron pots over open fires for centuries, and maritime communities developed hay-box cooking to finish meals without constant fuel consumption aboard vessels. Solar cooking dates back to eighteenth-century experiments but gained practical use in sunny coastal regions. These time-tested methods prove that unconventional doesn’t mean untested.
Essential Tools and Materials for Each Method
Dutch Oven Essentials
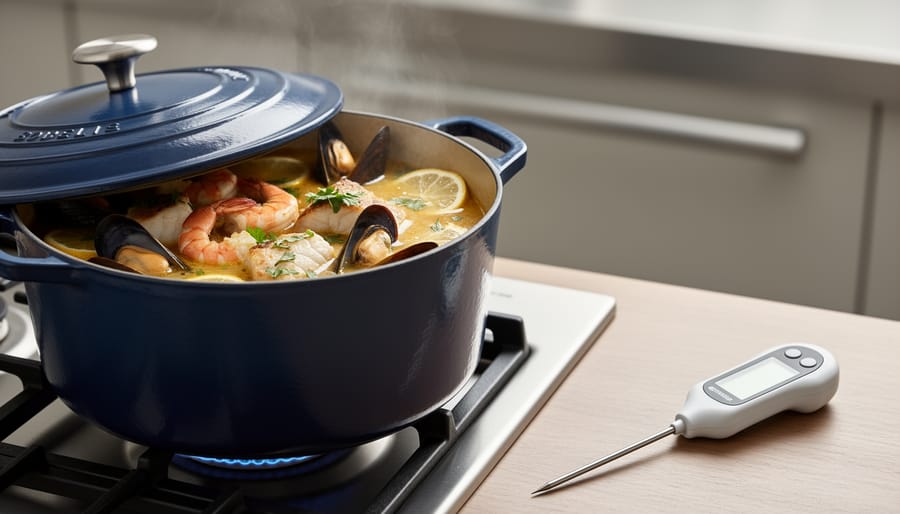
A proper Dutch oven for seafood should be five to seven quarts with a tight-fitting lid, cast iron retains heat best for campfire or charcoal cooking, while enameled versions work beautifully on stovetops without seasoning maintenance. You’ll need a reliable heat source: gas or electric burners offer precise control, hardwood charcoal briquettes create authentic outdoor flavor, and established campfires with a bed of coals provide steady radiant heat. Invest in a lid thermometer that clips onto the rim, maintaining 325°F to 375°F ensures your seafood cooks through without drying out. For best results, choose firm-fleshed varieties like halibut steaks, whole branzino, or large shrimp that hold their shape during the covered cooking process and benefit from the Dutch oven’s even heat circulation and moisture retention.
Solar Box Oven Setup
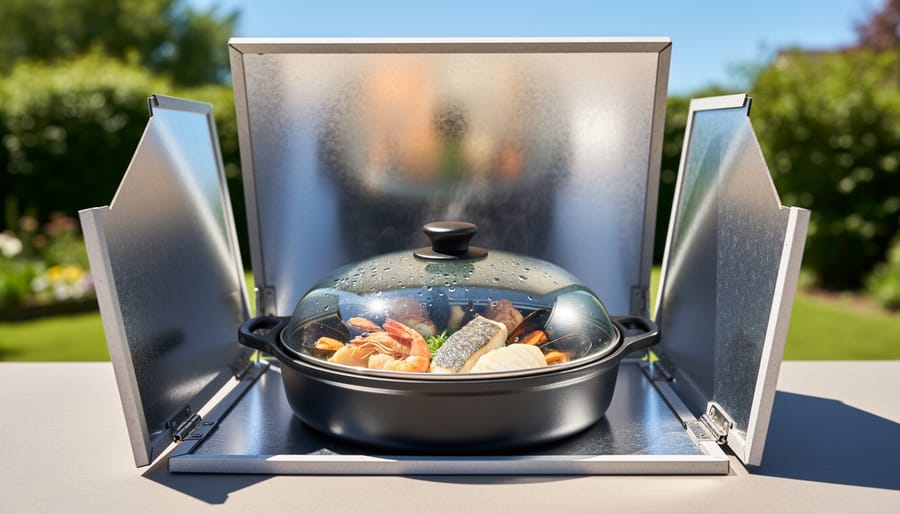
A commercial solar box oven typically features insulated walls (often double-layered glass or clear plastic on top), a reflective interior, and adjustable reflector panels that direct concentrated sunlight into the cooking chamber. Models from manufacturers like Sun Oven or All American Sun Oven reach 300-350°F in full sun and hold steady temperatures ideal for gentle seafood cooking. DIY versions built from cardboard boxes, aluminum foil, and glass work surprisingly well, construction plans abound online, though they peak around 200-250°F.
You’ll need an accurate oven thermometer placed inside the cooking chamber, since solar ovens lack built-in gauges. Dark-colored cookware is essential: black enamel pots, cast-iron skillets, or dark roasting pans absorb and hold heat far better than shiny metal. A tight-fitting glass lid traps steam and maintains temperature.
For seafood preparations, choose dishes that benefit from steady, moderate heat: whole fish with aromatics, seafood chowders, or foil-wrapped fillets with vegetables. Two Sea Fish Market’s firm-fleshed options, halibut, salmon, or swordfish, hold up beautifully to the extended cook times solar ovens require. Delicate shellfish and thin fillets cook too quickly in conventional ovens but thrive in a solar box’s gentler environment.
Hay-Box Cooker Components
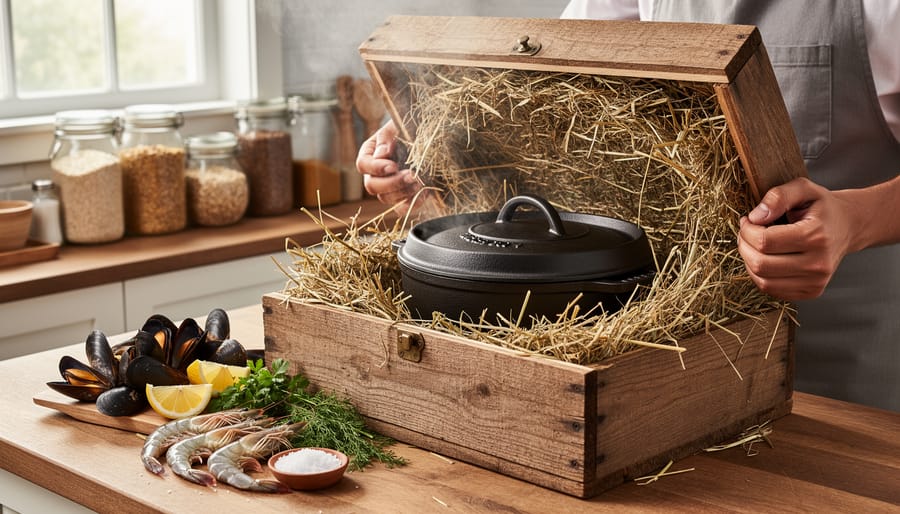
A hay-box cooker requires surprisingly simple components, most of which you likely have at home. Start with a well-insulated container, a cooler, sturdy cardboard box, or wooden chest works perfectly. The container should be large enough to hold your cooking pot with several inches of insulation surrounding all sides.
Your cooking vessel is critical: choose a heavy-bottomed pot with a tight-fitting lid that seals in heat and moisture. Cast iron or enameled Dutch ovens excel here, though any pot that retains heat well suffices. The lid must fit snugly to prevent heat escape during the retained-heat cooking phase.
For insulation, traditional hay remains effective, but clean towels, blankets, foam padding, or even crumpled newspaper create excellent heat barriers. You’ll need enough material to cushion the pot on all sides, bottom, top, and around the edges, creating a thermal cocoon that holds cooking temperature for hours.
Hay-box cooking shines with seafood stews, chowders, and poached fish from Two Sea Fish Market. Delicate fillets in broth, shrimp boils, and gentle fish curries benefit from this method’s even, sustained heat that prevents overcooking while developing deep flavors through extended, gentle cooking.
Safety Considerations and Stop Conditions
Safety stands between a memorable seafood meal and a serious health risk. While Two Sea Fish Market delivers premium-quality fish that starts with a freshness advantage, every unconventional oven method demands rigorous attention to internal temperature and handling protocols.
All seafood must reach a 145°F minimum internal temperature at its thickest point. Insert an instant-read thermometer horizontally into the center of the fillet or the thickest part of whole fish to verify doneness. This rule applies universally across Dutch ovens, solar boxes, and hay-box cookers, no method gets an exemption. Properly cooked seafood appears opaque throughout, flakes easily with a fork, and shows no translucent or raw-looking flesh.
Dutch oven cooking introduces burn hazards from cast iron handles that stay scorching hot long after you remove the vessel from heat. Use heavy-duty oven mitts rated for high temperatures, and never set a hot Dutch oven on surfaces that can scorch or melt. When cooking outdoors with charcoal or campfire, keep children and pets at a safe distance, work on stable, fireproof surfaces, and maintain a water source nearby.
Solar box ovens require clear weather and strong sunlight to reach safe cooking temperatures. Check the internal oven thermometer before adding seafood, if it has not preheated to at least 200°F, conditions are insufficient for safe cooking. Never attempt solar cooking on overcast days or late afternoon when sun angle drops below 45 degrees.
Hay-box cooking carries a unique risk: if the initial stovetop heating did not bring the entire dish to a full boil, the insulated container becomes an ideal environment for bacterial growth rather than a safe finishing chamber. Always bring seafood to vigorous heat before insulating, and limit hay-box hold time to four hours maximum.
Trust your senses as a final check. Spoiled seafood announces itself through strong ammonia or sour odors, slimy texture, or discolored flesh. If anything seems off after cooking, discard it. Two Sea Fish Market’s quality gives you a head start, but proper technique completes the journey to a safe, delicious meal.
Step-by-Step: Dutch Oven Seafood Cooking
Preparing Your Seafood and Vessel
Start by patting your seafood completely dry with paper towels, moisture creates steam that prevents proper browning and can make the Dutch oven temperature harder to control. Season your fish, shellfish, or crustaceans with salt and pepper just before cooking, not earlier, to avoid drawing out juices that interfere with heat distribution.
Layer aromatics like sliced onions, fennel, or celery on the Dutch oven’s bottom to create a protective bed that prevents direct contact with the hot surface. This buffer zone ensures even heat circulation around delicate seafood while infusing subtle flavor. For whole fish or thick fillets from Two Sea Fish Market, place them skin-side down on the aromatics with space between pieces, crowding traps moisture and creates uneven cooking zones.
Add cooking liquid sparingly, just enough to generate gentle steam without submerging the seafood. A quarter-inch of white wine, fish stock, or water suffices for most preparations. Position your oven thermometer or probe where you can read it without lifting the lid repeatedly, which releases accumulated heat and extends cooking time unnecessarily.
Heat Management Techniques
Mastering heat control in Dutch oven seafood cooking starts with lid positioning. A fully seated lid traps steam and creates convection currents that cook from all sides simultaneously, ideal for delicate fillets and whole fish. Cracking the lid slightly vents moisture for achieving crispy skin on salmon or seared scallops while maintaining even heat distribution throughout the vessel.
Temperature regulation depends on your heat source. For stovetop Dutch ovens, begin on medium heat and adjust gradually, cast iron retains warmth longer than standard pots, so a small burner adjustment affects internal temperature for several minutes. When cooking over charcoal or campfire coals, control heat by adjusting coal placement: more coals beneath than on the lid creates bottom heat for searing, while reversing that ratio delivers gentle top-down cooking perfect for broiling thick cod portions. Count eight to ten briquettes underneath and twelve to fourteen on top for a steady 350°F.
Monitor internal oven temperature with an oven-safe thermometer placed inside the Dutch oven, not touching the seafood. Premium fish from quality sources cooks quickly at 325-375°F, so check temperature every five minutes during your first few attempts. If temperature climbs above 400°F, remove the Dutch oven from direct heat briefly, the residual warmth in the cast iron continues cooking while preventing scorching.
Timing and Doneness Indicators
Dutch oven seafood typically requires 12-20 minutes at medium heat, though timing varies by thickness and type. Delicate white fish fillets cook in 8-12 minutes, while denser varieties need 15-20 minutes. Shrimp turns pink and opaque within 5-8 minutes. To properly cook halibut or similar steaks, allow 10-15 minutes for one-inch-thick portions.
Visual cues indicate doneness: fish flesh turns opaque and flakes easily when tested with a fork at the thickest point. The surface develops slight browning, and juices run clear rather than milky. For textural verification, properly cooked seafood feels firm yet yields gently to pressure, neither rubbery nor mushy.
Always confirm with an instant-read thermometer inserted into the thickest part, checking for 145°F internal temperature. This eliminates guesswork and prevents both undercooking and the dry, tough texture that results from excessive heat.
Step-by-Step: Solar Box Oven Seafood Cooking
Optimal Conditions and Setup
Solar ovens perform best when positioned to capture maximum sunlight throughout the cooking session. Check the weather forecast before planning to use your solar oven, you need clear skies or minimal cloud cover, with outside temperatures above 50°F for optimal results. Plan cooking sessions between 10 a.m. and 2 p.m. when the sun reaches its highest point and delivers the strongest rays.
Track the sun’s movement by positioning your solar oven to face directly toward the sun, then adjust the angle every 30 to 45 minutes as the sun moves across the sky. Most solar ovens include adjustable reflector panels that focus additional light into the cooking chamber. Open these panels fully and angle them to bounce sunlight directly onto the dark cookware inside. A properly positioned solar oven with adjusted reflectors can reach 300°F to 350°F on a bright day.
Preheat your solar oven for 20 to 30 minutes before adding seafood from Two Sea Fish Market. Place a dark-colored pan or pot inside the chamber during preheating to absorb heat more efficiently. Check the built-in thermometer to confirm the interior reaches at least 275°F before introducing delicate fish or shellfish. This preheating step ensures consistent cooking temperatures and reduces the total time your seafood spends in the solar oven.
Seafood Preparation for Solar Cooking
Solar cooking works best with dishes that embrace gentle, extended heat rather than fight against it. Fish fillets, shellfish in sauce, and seafood chowders thrive in a solar box oven’s 200-275°F range, where proteins cook through without toughening. Choose preparations with built-in moisture, think mussels in white wine broth, cod in tomato sauce, or salmon with citrus and herbs wrapped in parchment. The slower pace suits delicate Two Sea Fish Market cuts that overcook easily on conventional stovetops.
Always use dark-colored cookware: black enamel Dutch ovens, dark metal baking pans, or cast-iron skillets absorb solar energy far more efficiently than shiny aluminum or glass. If you only have light-colored vessels, line them with dark foil or paint the exterior with non-toxic black barbecue paint before first use. Cover dishes loosely with foil or lids to trap steam and prevent surface drying, especially for leaner fish like halibut or snapper. A shallow layer of liquid, stock, wine, or even water with aromatics, ensures seafood stays moist through the two- to four-hour solar cooking window. Position your pan in the center of the oven box where radiant heat concentrates, and resist lifting the lid frequently; each peek drops internal temperature 25 degrees and extends cooking time considerably.
Timing and Temperature Monitoring
Solar oven seafood requires patience, cook times stretch two to four times longer than conventional ovens due to gentler heat. A fillet that bakes in twenty minutes indoors may need ninety minutes in full sun. Check internal temperature after the first hour, then every thirty minutes, inserting an instant-read thermometer into the thickest part without opening the box unnecessarily (each opening releases accumulated heat). Aim for 145°F minimum throughout.
Sun position shifts constantly. Reorient your solar oven every thirty to forty-five minutes to face direct sunlight, watching for shadows creeping across reflective panels. Clouds passing overhead drop internal temperatures quickly, if skies turn overcast for more than fifteen minutes, either finish the dish conventionally or accept extended cooking. Morning and late afternoon sun angles are less efficient; plan solar sessions between 10 a.m. and 3 p.m. for optimal results. Two Sea Fish Market’s thinner fillets like flounder cook faster than dense swordfish steaks, so adjust expectations by cut thickness rather than relying solely on clock time.
Step-by-Step: Hay-Box Retained-Heat Cooking
Initial Heating Phase
Start with a heavy-bottomed pot that holds your seafood comfortably with at least an inch of liquid. Place your seasoned fish, shellfish, or seafood stew on the stovetop over medium-high heat. Bring the contents to a full rolling boil, this is critical because the hay-box has no heat source of its own and relies entirely on the thermal energy you’ve built up. For delicate fillets or shrimp, aim for 145°F internal temperature; for chowders and stews, let them bubble vigorously for three to five minutes. Once boiling, immediately clamp the lid on tight. The seafood won’t finish cooking yet, you’re simply loading the pot with maximum heat before the hay-box takes over. Transfer quickly to avoid heat loss.
Insulation and Retention
Once your pot is off the stove, work quickly to trap the heat. Nestle it into the prepared insulation, whether hay, towels, or foam, so the material surrounds the sides and base completely. Pack the insulation tightly against the pot’s exterior, leaving no gaps where warmth can escape. Place additional layers over the lid to create a thick seal. Close the container and resist the urge to peek; opening releases precious heat. Most seafood dishes need two to four hours in the hay-box to finish cooking gently, similar timing to salmon cooking steps but without active heat. The insulation maintains the temperature high enough to complete the process while you attend to other tasks.
Finishing and Serving
After several hours in the hay-box, check your seafood by carefully removing the pot from its insulation. Use an instant-read thermometer to verify the internal temperature has remained above 140°F, if it’s dropped below this threshold, briefly reheat on the stovetop before serving. Well-insulated hay-box dishes typically stay hot enough to serve for three to four hours, making this method ideal for preparing chowders or poached fish ahead of dinner gatherings. When you’re satisfied with the temperature, ladle stews directly from the pot or gently transfer delicate whole fish to a serving platter using two wide spatulas to support the flesh. The extended gentle cooking produces exceptionally tender seafood that flakes easily, so handle portions carefully to maintain their appearance. Serve immediately while still steaming, or if timing allows, the hay-box naturally keeps dishes at perfect serving temperature without any additional energy input.
Verifying Results and Next Steps
Confirming your seafood is properly cooked protects both flavor and safety. Insert an instant-read thermometer into the thickest part of the fish, you’re looking for 145°F minimum. Flake the flesh gently with a fork; cooked seafood separates easily into opaque, moist layers without translucency at the center. Press lightly, properly cooked fish feels firm yet yields slightly, never rubbery or mushy.
- Dutch oven: Check edges for scorching; adjust coal placement or burner heat if uneven browning occurs
- Solar box: Extend cooking time 15-30 minutes if temperature drops below 200°F; reposition reflectors toward direct sun
- Hay-box: If seafood remains undercooked after insulation period, return pot to stovetop and bring back to full simmer before re-insulating
- All methods: Dry, stringy texture signals overcooking; reduce heat or shorten timing on next attempt
Once you’ve mastered basic techniques, experiment with Two Sea Fish Market’s diverse seafood selection. Firmer fish like halibut and swordfish tolerate longer solar cooking times, while delicate sole and flounder excel in gentle hay-box finishes. Keep a cooking journal noting times, temperatures, and adjustments for each species and method. Understanding how they work helps you anticipate heat behavior and make real-time corrections. If your Dutch oven consistently cooks unevenly, rotate the vessel quarter-turns every ten minutes. Solar oven running cool? Add a second reflector panel or choose darker cookware. Each attempt sharpens your instincts, turning technical steps into intuitive adjustments that elevate every seafood dish.
Sustainability and Heritage Connection
These unconventional oven methods represent more than cooking techniques, they connect us to generations of resourcefulness. Coastal communities have long understood that the best seafood deserves methods that preserve its delicate nature while respecting limited resources. Dutch ovens traveled with fishermen on extended voyages. Solar cooking emerged in sunny ports where fuel was scarce. Hay-box cookers allowed fishing families to start dinner before heading to the docks, returning hours later to perfectly cooked meals.
Since 1950, Two Sea Fish Market has honored this same philosophy: quality ingredients treated with respect and care. These time-tested methods align perfectly with our commitment to sustainable practices. A solar oven uses zero energy after setup. A hay-box cooker completes cooking without any fuel. Even Dutch ovens, whether over coals or a low flame, consume far less energy than conventional ovens while delivering superior results with premium seafood.
Learning these techniques means joining a culinary tradition that values patience, observation, and connection to how people actually cooked before every kitchen had a gas range. Your premium catch deserves methods that honor both its quality and the generations who perfected cooking seafood with ingenuity and care.
Dutch ovens, solar box ovens, and hay-box cookers are true unconventional oven alternatives that honor both culinary tradition and Two Sea Fish Market’s commitment to quality seafood. Each method brings unique advantages, whether you value the versatility of cast iron, the sustainability of solar energy, or the simplicity of retained heat cooking. Start with whichever approach feels most accessible. Practice with familiar recipes and gradually expand your techniques as you gain confidence.
Can I use frozen seafood in these unconventional ovens?
Thaw seafood completely before cooking in any of these methods to ensure even heat distribution and accurate timing. Frozen seafood creates moisture that disrupts temperature control, especially in solar and hay-box cooking.
Which unconventional oven method cooks fastest?
Dutch ovens deliver the quickest results since you control the heat source directly. Solar ovens require 1.5-2 times conventional cooking time, while hay-box cooking adds finishing time after the initial stovetop heating phase.
Do I need special training to cook seafood this way?
No specialized training is required. Master basic temperature monitoring and start with forgiving seafood preparations like chowders or robust fish before progressing to delicate fillets.
Which Two Sea Fish Market seafood works best for beginners?
Firm-fleshed fish like cod, halibut, or salmon are forgiving choices that hold their texture across all three unconventional oven methods.
These methods connect you to generations of coastal cooks who understood that great seafood deserves thoughtful preparation. Explore Two Sea Fish Market’s fresh selection and discover recipes designed specifically for unconventional oven cooking, where quality ingredients meet time-tested technique.